What is landscape in photography definition. Coursework: Photographing landscape photography. Composition in landscape photography
- a genre of fine art, the main task of which is to display the surrounding nature, both in its original form, and in one way or another changed by man. Since photography is one of the fine arts, landscape photography fully complies with this definition. The main visual center of landscape photography is nature in all its manifestations.

Of course, the landscape, as a genre, appeared long before the invention of photography - in painting. And honed for centuries artistic means images of the landscape formed a number of necessary conditions that are mandatory for this genre of photography. Linear perspective , tonal (air) perspective, optical perspective,frame composition , light space And color - these are the main characteristics of landscape photography, capable of not only very accurately conveying the state of the surrounding nature at a certain point in time, but also highlighting semantic center image without the use of additional manipulative techniques. And despite the fact that in landscape photography the presence of people or animals in the frame is allowed, they are clearly assigned the role of staffing - an element of the landscape that exists to enliven the image and plays a secondary role in this image.

Landscape photography is essentially documentary photography about nature. According to the type of space depicted, landscape photography can be terrestrial, water, astronomical and meteorological. Terrestrial landscape photography depicts landscape, topography, and vegetation and is both rural and urban.


water landscape (seascape, marina) is an image of the water (sea) element.

astronomical landscape photography depicts the heavens (stars, constellations, sun, moon),

and meteorological - weather and precipitation (fog, rain, clouds, tornado, etc.).

According to the way of depicting space, landscape photography can be chamber and panoramic. Camera photography in this case does not imply a narrow circle of viewers, but expresses purely technical specification- a small, narrow viewing angle of the depicted space.
panoramic landscape photography is the absolute opposite - it is a photograph, the viewing angle of which can often exceed 180 degrees.


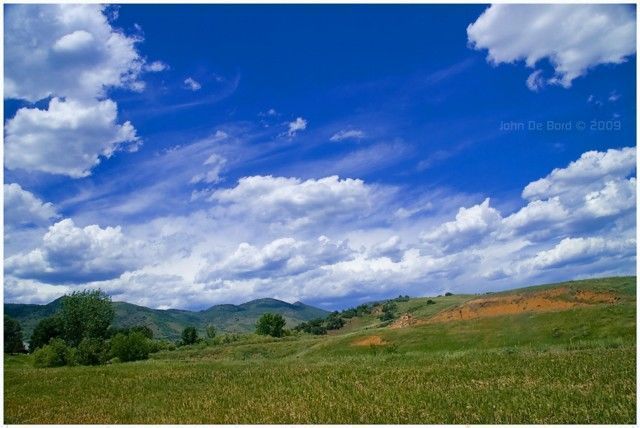
According to the degree of perception by the viewer, the landscape can be, by analogy with music, minor or major. Tragic or solemn. Dull or cheerful. In solving this problem, the photographer comes to the rescue color theory, namely one of its sections - color psychology. Knowing what colors and how they affect the mind of the viewer, the photographer can adjust composition color balance landscape to achieve a specific result. At the same time, in a landscape, not always cold shades can create an atmosphere of hostility, and warm ones can create friendliness. Small colored vegetation against the background of black thunderclouds looks defenseless, and the picture as a whole causes a feeling of anxiety, while the cold Elbrus causes awe and delight with its grandeur.


Of course, several of the listed natural spaces and states can easily overlap in one picture at the same time, but in this case it will be important for a landscape photographer to decide what exactly in this picture is semantic center, and select this center using visual means — perspectives, compositions, Sveta, colors.

If there is no such center, then landscape photography is purely aesthetic, narrative-specific in nature and is used for decorative, scientific or journalistic purposes. It is to the category of aesthetic perception that landscape photography belongs. plein air- a true transfer in the image of nature of the colorful richness of color changes in natural conditions under the influence of sunlight and atmosphere.

If there is still a semantic center in landscape photography, then such a landscape will be charged with emotional-dramatic (or epic) energy and will acquire features artistic landscape photography.

Along with the mandatory conditions for creating landscape photography, there are a number of conditions that are specific in nature - dynamism , angle , detail. Considering that photography is a static and silent form of fine art, it is in a photographic landscape that it is most difficult to convey certain atmospheric phenomena with great accuracy. How to show a strong wind in a desert photo? How can mountain giants be depicted more majestically? It is in these cases that the landscape photographer is saved by knowledge about the dynamics of the frame, the point of shooting and the angle.
Widespread in our time travel landscape photography. Not being essentially a separate genre, travel landscape photography has become very popular due to both the availability of photographic equipment and the opportunity to visit the most remote corners of our planet.
The main feature of landscape photography is its accessibility. It does not require any scenery and staging tricks, it does not depend on the mood of the photo model and the preferences of the customer. It depends on the environment and weather conditions. And in this sense landscape photography unique. Whether it is a park or an alley within the city, or maybe a mountain range or a quiet expanse of a lake outside it - wherever you are, on vacation or on a business trip, in your country or abroad, it is everywhere - nature is amazing a natural space that can change its shape, content and color every minute, day after day, all year round, for millennia... And even if a landscape photograph taken by you does not contain any semantic core, it will always be aesthetic, which means will always remind you of the essence and forms of beauty.
Articles
We continue to acquaint our readers with the best contemporary photographers. Today we will talk about the genre of landscape. So, read our review, share it with your friends and get inspired by admiring the works of landscape masters!
Dmitry Arkhipov
Website
A native Muscovite Dmitry Arkhipov has been fond of photography since childhood. A physicist by education, Dmitry served in the army, worked at the Institute for Space Research under the Buran program, created his own well-known IT company, while continuing to improve in the field of landscape photography.
The results of his travels to 108 countries of the world were five solo exhibitions, where Dmitry's works were seen by more than a million people. Now Dmitry Arkhipov is a titled photographer, member of the Union of Photographers of Russia, winner and laureate of national and international photo contests.
Blog

Denis Budkov is a native of Kamchatka, since 1995 he has been traveling and photographing his native land. Love for nature and the desire to show all its beauty became an incentive to learn the basics of photography and improve skills in practice. Denis's main passion is volcanoes, which are so rich in the nature of Kamchatka. The volcanic eruptions and peaceful Kamchatka landscapes captured by him have already received awards from the prestigious photo contests Best of Russia 2009, 2013, Wildlife of Russia 2011, 2013, Golden Turtle, Wildlife Photographer of the Year - 2011. Denis says that photography for him is a way of life, which is completely satisfactory. The main thing is to wait for the right moment to make the same frame.
Vkontakte
Website

Mikhail Vershinin became interested in photography as a child; he had to give up visiting the photo studio in favor of another hobby - rock climbing and mountaineering, but even on sports routes he took a camera with him. Craving for travel in wild places and passion for filming eventually led Mikhail Vershinin to landscape photography. He explains his choice of this particular genre not only by a craving for nature, but also by a special mood, the ability to convey feelings and emotions with the help of a captured moment. The works of Mikhail Vershinin have repeatedly become finalists and winners of Russian and international competitions, including National Geographic Russia - 2004 and FIAP Trierenberg Super Circuit - 2011 in the Night Image nomination.
Website

Oleg Gaponyuk, a MIPT graduate, lives and works in Moscow and has an unusual hobby - panoramic photography. For the sake of a good picture, he can easily go to the other side of the earth, while skiing, windsurfing and diving along the way. Despite the fact that his sports hobbies are associated with mountains, seas and oceans, in the field of photography Oleg became interested in creating spherical panoramas in the air. He is actively involved in the AirPano.ru project, within which more than 1,500 bird's-eye panoramas have already been made in the most interesting cities and corners of the world. In terms of the geography of shooting, the number of aerial panoramas and the artistic value of the material, this project is one of the world leaders in this type of panoramic photography.
Blog

MIPT graduate Daniil Korzhonov prefers to call himself an amateur photographer, because he simply does what he likes. Photography allowed him to combine his passion for painting and love of travel. As a landscape photographer, he visits the most beautiful places in the world and “paints” what he sees on film. Combining photography with travel allows Daniil to lead active image life and express your thoughts and feelings through beautiful and original shots, taken both in wild corners and on the streets of cities. He advises all novice photographers to shoot as much and as often as possible in order to better understand the surrounding beauty of the world.
Website

Vladimir Medvedev - founder of the Club of Photographers wildlife, tireless traveler, professional photographer, winner of international competitions, including the 2012 BBC Wildlife Photography Competition for the Eric Hosking Portfolio Award. Cooperation with wildlife reserves around the world allows Vladimir to take unique shots of the virgin world and its inhabitants. According to Vladimir Medvedev, photography is both an art, a means of understanding the world, and a means of influencing the world. Starting photography is easy - you just need to buy a camera and learn from the best.
Yuri Pustovoi
Website

Yuriy Pustovoy is a graduate of VGIK, a cinematographer at the Odessa Film Studio with ten years of experience and a distinguished travel photographer. His work was recognized by the jury and visitors international exhibitions and photo contests, in the treasury of Yuri's awards is the Gold Medal of the International Federation of Photography FIAP Global Arctic Awards 2012. Yuri Pustovoy is not only a traveler and photographer, but also an organizer of photo tours for real amateur photographers and beginners. Landscapes from various parts of the world fall into the scopes of cameras of Yuri and his team. During the tour, Yuri shares his photographic experience, helps during filming with advice and deed, teaches how to process photographs in graphic editors.
Sergey Semenov
Facebook (over 800 followers)
Website

Sergei Semyonov became interested in photography in 2003, when for the first time in his life he fell into his hands digital camera. Since then, he not only devoted all his free time to this hobby, but also turned photography into a profession, exchanging a career as an economist for the fate of a travel photographer. In pursuit of the most beautiful views of the earth, Sergey visits National parks North America, the mountains of Patagonia, the icy lagoons of Iceland, the Brazilian jungle and hot deserts. He shoots his favorite landscapes from a bird's eye view and is an active participant in the AirPano.ru project. In his first panorama, Sergei showed the Kremlin as birds see it.
Facebook (over 700 subscribers)
Website

The Belarusian photographer is known as a master of the landscape genre. Like many of his colleagues, he believes that beauty is everywhere, and the photographer's skill lies in showing it to the viewer. He is characterized by exactingness to himself and the quality of his work. You will be surprised, but sometimes Vlad comes to the same place several times to achieve the right lighting and shoot a great shot. And yet, Vlad has been reading our magazine for a long time and regularly shares his photos with our entire audience.
Alexey Suloev
Website

Aleksey Suloev got his first camera at the age of seven and quickly got used to taking pictures of everything around him, especially since his passion for tourism allowed him to find himself in the most unusual, undeveloped places in the Caucasus, the Pamirs and the Tien Shan. Gradually, tourist trips turned into real photo trips. In pursuit of unusual shots, Alexey has already visited more than a hundred countries, the geography of his trips includes the most inaccessible and untouched places on our planet from the North to the South Pole. Alexey shoots because he cannot describe in words the beauty and diversity of the earth. He generously shares everything he sees with his audience so that everyone can find creative inspiration in the inexhaustibility of nature.
A few years ago I became interested in landscape photography. This is a fantastic hobby, very useful and able to teach a lot. I do not yet consider myself a professional in this field, but I have a few useful tips, which can be useful for those who are just starting to get acquainted with the world of landscape photography.
Why you need to study the shooting location
If you are planning a photo tour, it is important to do some preparatory research. Use the Internet to find as much information as possible about the future location of the shooting. Try to identify potentially interesting places and find out the best time to shoot - some places are most photogenic at certain times of the year, while others are all year round. Try to avoid peak tourist seasons as popular locations will get in the way of your shots.
There are some great utilities to help you prepare for your trip. Google Maps and Google Earth will allow you to get an idea of exactly how everything looks there, and in some cases even take pictures without getting up from your computer! Detailed view is not yet available for all points, but at least you can get a rough idea of the places you are going to visit.
Another great utility for the landscape photographer is The Photographers Ephemeris. This component will tell you the exact time of sunrise and sunset and the moon on any day anywhere in the world. Moreover - it will show you the direction in which the sun or moon will be at this time. Based on this information, you can plan your shoot more carefully.
Whether you're planning to shoot on a trip or close to home, take a look at the photos taken by other photographers in the area. This will give you ideas for shooting locations. But do not just try to copy their successful photos, have your own view of things.
Conduct field reconnaissance
Your trip doesn't end with the start research. While the internet allows you to plan and prepare your trip, there is no substitute for walking around the location in terms of finding locations to shoot from. Use the middle of the day for this study, when the light is too hard to shoot. This will allow you to present the shots and their composition before you go to shoot. The last thing you want to do when the light is right is to frantically search for the best vantage point.
This is the most time-consuming and boring part of the photo tour, but if you don't have an organizer or don't know the place well, it's a necessary evil.
Getting a great composition
After you have found an interesting place, you still have to decide how to compose the shot. This is a very subjective area and it's hard to give precise recipes for what's good for composition and what's bad. The best photographers seem to have eyes that are so arranged that they immediately see from what angle and from where it is best to take a picture that will attract the viewer. There are a few rules to follow, but on the other hand, a number of outstanding photographs break these rules, so don't take them as dogma. However, keep these in mind:
- Avoid clutter. Include in the frame only what you want to show the viewer. The best photographs are usually simple and clean. If unwanted objects such as electric poles, cars, roads, buildings, etc. enter the frame. - try another angle where they are not visible. Small objects can be removed in post-processing, but large objects will distract the viewer.
Simple compositions are usually the best.
- Include an interesting foreground. When shooting a sunset, you should not rely only on the beauty of the sky. Objects in the foreground such as rocks, water, etc. balance the photo and draw attention to the picture.
Lots of boulders create an interesting foreground.
- Leading lines are a great way to draw attention to a photo. Piers, docks, and roads are obvious examples, but look out for rock formations as well.
Using stones to create leading lines.
- Avoid placing the horizon or focal point in the center of the frame. Use the rule of thirds as a framing guide.
And do not forget to regard all of the above as recommendations only. Rules are made to be broken!
Waiting for the light
After the work on the study of the area is completed - it's time to move to the selected location and wait for the correct light to release the shutter. What happens next does not depend on you in any way and you just have to rely on mother nature in everything.
The best time to shoot is around sunrise and sunset, which photographers commonly refer to as golden hours. At other times during the day, the light is usually too hard and flat, making photos look dull and faded. There are, of course, exceptions, but most beautiful landscape photographs are taken during golden hours.
Once you've composed your shot, all you have to do is wait for the right light. This is easier said than done! There are days (in fact there are many such days) when mother nature doesn't want to play with you and shows you a sunrise or sunset that isn't as beautiful as you expect. In my opinion, this is the hardest part of being a landscape photographer - no matter how much effort you put into preparation and planning, how well equipped you are, how experienced you are as a photographer - if you don't have the right light, you won't get beautiful photos.
Moments like this are hard to live through - coming back empty-handed after waking up at 4am to shoot a sunrise is never fun - but when it's done, little things like that are quickly forgotten. There is nothing better for a landscape photographer than when the light is good and you capture this magic on camera.
It's worth it when everything works out.
Lighting types
Depending on where the sun is located, there are different types of lighting. The type of light you use is sometimes dictated by the landscape you are shooting, but sometimes you can use different compositions and therefore lighting. It is generally accepted that for landscapes side lighting is most suitable, in which the sun is located to the left or right of the camera. This is due to the contrast between light and shadow created by directional light and adding depth to the shot. However, both backlight and frontlight, when the sun is behind you or in front of you, can also make good photos.
I often shoot against the sun as I believe that is where the most intense colors are concentrated. To do this, it is better to wait until the sun is low enough above the horizon to avoid light and sun glare in the frame. When the sun is higher - side lighting is more preferable.
Side lighting creates long shadows, adding shape and texture to photos.
The front light highlights the clouds beautifully.
Shots with the sun in the frame usually look impressive if glare is under control.
Equipment
One of the questions I get asked a lot (especially by non-photographers) is what kind of camera and lenses do I use. For me, this is a bit of a strange question - sort of like asking an artist what brand of brushes he uses, or a builder what brand of hammer he has. The fact is that neither the camera nor the lenses have a very noticeable effect on the final result. Yes, it's true that top cameras produce higher resolution photos with less noise, and better lenses produce slightly sharper photos, etc., but if you don't print huge prints, then this is not so important.
By the way, now I use Canon 40D, and lenses most often are Sigma 10-20 and Tamron 17-50. However, some of my earlier shots were taken with the Canon 350D, which is inferior in functionality to any entry-level camera today, but gives more than acceptable results.
Filmed onCanon 350D.
A tripod is a necessary piece of equipment due to the fact that many shots are taken in low light conditions, which leads to slower shutter speeds than can be shot handheld. Another advantage of a tripod is that it allows you to compose your shot in advance, as well as bracketing (multiple shots of the same shot at different exposures).
Exposure bracketing is important when it is not possible to capture the entire dynamic range of the frame in one shot. For example, at dawn or dusk, the sky may be several stops brighter than the foreground. As a rule, the brightness difference is too large for the camera, so a compromise is necessary. Either save the shadows at the cost of losing the highlights, or vice versa - in any case, some of the details will be lost.
By taking several shots with different exposures of the same frame, you can assemble the frame in post-processing through HDR or layer blending. For this kind of processing it is desirable that the camera stays still between shots - that's why a tripod is so important. Almost all reflex cameras have an auto exposure bracketing mode that can be enabled via the menu.
HDR image obtained from 3 frames.
Until now, the most important part of my equipment - filters. In particular, gradient filters. These are square plates, in which one half is light and the other half is dark with a gradient transition between them. The dark part is neutral gray and is designed to reduce the amount of light in that part of the frame (usually the sky). They are produced in different densities (from 1 to 4 feet) and are also available in soft and hard versions. Soft ones have a smoother gradient transition and are used if the foreground overlaps the sky (for example, mountain peaks), while hard ones have a sharper border and are used when there is no strong overlap of the sky with the foreground.
I use gradient filters for almost all of my sunset/sunrise photography, where 3 and 4 stop hard filters are most applicable. They balance the difference between the brightness of the sky and the foreground and allow me to limit myself to one shot instead of several that are then collected on the computer. I find it more correct to create photos in the camera than to spend extra time processing photos and getting the result I want.
gradient filters. On the left with a hard border, on the right - with a soft one.
A 3-stop hard gradient filter balances bright skies with dark foregrounds.
Another filter I use is a polarizer. The two main uses of polarizers are to reduce glare (for example, from water) and to enhance color intensity (for example, from blue skies or autumn foliage). This filter cannot be simulated in post-processing.
A polarizer can enhance the color of autumn leaves.
The third type of filter I use is a powerful Neutral Gray (ND) filter. Unlike gradient filters, it is all dark and reduces the intensity of light throughout the field of the frame, and not in separate places. An ND filter is usually used to use a slower shutter speed than the available light will allow. This is especially useful for shooting flowing water, as long exposures give the water a smoother, ethereal look that many photographers love.
ND filters are available in various strengths, usually up to 3 stops (they reduce the amount of light entering the matrix by 8 times). However, much stronger filters are also produced, such as the B+W ND110. This is a 10 stop filter and it reduces the amount of light by 1000 times! Such a strong filter gives some creative options for shooting in lighting conditions where the light is usually too harsh for landscape photography, especially with moving clouds and flowing water in the frame.
Lake Hayes, Queenstown. Shot with 10-stopND filter on a sunny day.
The use of a 10-stop ND filter allows you to shoot dawn with long exposures.
post-processing
Since I shoot in RAW format, all my pictures are post-processed, to one degree or another. RAW frames contain raw, uncompressed information received by the camera. In contrast, the JPEG format involves conversion and post-processing (sharpness, saturation, contrast, and other parameters) in the camera. So when people brag about their photos "straight from the camera" and "no processing" - it usually means that they shot in JPEG and left the processing of photos to the camera's automation. While this is by far the most convenient option, and for some types of photography where you want to get shots quickly, it's essential, but I think it's best to have control over how your shots are processed.
The main benefit of shooting in RAW is that you get more information to work with. After converting an image to JPEG format, a lot of information is lost forever, and the RAW file contains all the information that the camera was able to get. This gives you more freedom to adjust exposure and other settings, allowing you to process the file in a variety of ways. This can come in handy when your processing skills improve (or better software tools become available) and you want to re-process old photos. RAW files are sometimes referred to as "digital negatives".
The degree of post-processing is determined by your personal taste. Some prefer minimal processing such as sharpening, noise reduction, and minor enhancements to contrast, curves, and saturation. Others prefer to use their artistic vision to give their photos a surreal look (this is especially the case for many HDR enthusiasts). Personally, I prefer to let the natural light speak without interrupting it with post-processing. However, if the natural light was too average or I'm in a creative mood, I can use other processing techniques. Most of my shots are in the minimally processed category.
Good light minimizes the need for handling.
A more creative look with post-processing.
Summary
shoot good landscape photography It's easy if you do it wisely. In essence, it is enough to come to the right place at the right time and, knowing a few simple tricks, take a picture. The most important thing is to get out of the house more often and take pictures. The best way to learn something is to make mistakes, and don't forget to have fun filming!
Good day. Today I'm going to talk a little about my approach to landscape photography.
The landscape for me is probably the most favorite and pleasant type of shooting, because, while photographing, I at the same time relax my soul, enjoying the beauty that nature has created. Photographing nature is an incredible pleasure - climbing into its quiet corners, you get such a boost of energy and vigor, which then lasts for a long time. The wind in the face, the sun on the lips, the legs shaking from fatigue in the evening and the heart filled with love for everything around - what could be better?
For beginners, as a rule, it seems that there is nothing easier than shooting a landscape. I remember one of the novice amateur photographers on the Photomonster forum wrote that there is nothing difficult in shooting landscapes, the only difficulty is to get to the place of shooting. At first glance, yes: here is a pond, here is a forest, here is a road, here is the sky with clouds floating on it - just take the camera and shoot. But, basically, after the first such shooting, it becomes clear that it is not so easy to find an interesting plot, it is difficult to see the unusual in the ordinary, even to compose the frame correctly, to make the right accent is not always possible for a beginner. After all, it is very important for a landscape painter not only to capture the beauty of some picturesque corner, but to be able to show the mood of nature itself, its state, the harmony of color and light - all together this is the key to the success of landscape photography.
Landscape photography equipment
So, I'll start with what is necessary for shooting landscapes in terms of equipment and what I mainly use. In principle, you can shoot on any device, but, of course, full-length cameras in this regard provide more creative opportunities when shooting. I usually shoot nature Nikon D800 E. Landscape painters use different lenses, up to long-focus ones - the main thing here is to know the goals and objectives that are set. But still, landscapes are more often shot with wide-angle optics - it is this lens that allows you to capture the breadth and expanse of the nature being photographed, and it is this lens that gives the sharpness that is so necessary for such shooting throughout the frame.
Initially, I shot landscapes with a lens Nikon AF-S 24-70mm f/2.8G ED. A wonderful lens, I can’t say anything bad about it - many of my shots were taken with it. For example, here are these:


Gradually, I began to miss the angle of this zoom lens, and was purchased Nikon AF-S 14-24mm f/2.8G ED. Now I mainly use it when shooting landscapes - a super-sharp wide-angle lens is exactly what a landscape painter needs. Here are some examples shot with this lens:


Now let's talk a little about tripods. A tripod is an essential piece of equipment for a landscape painter, it gives you much more exposure control and is especially important when shooting low-light scenes such as sunrise and sunset. I have two tripods in my arsenal and, as a rule, I take both of them on trips (of course, if these trips are by car). One tripod is heavy and reliable - Manfrotto 055XPRO3. I use my head with it Manfrotto 410 Junior- very convenient compact 3-axis tripod head, which has a mechanism for precise positioning in three directions; pan, front and side tilt. I usually use this tripod if shooting takes place close to the car, for long distances it becomes too heavy a burden. Therefore, I have another tripod for hiking, it is lighter, but quite reliable and has never let me down. This is about Fotopro X5IW+52Q. What else I like about this tripod is that it easily turns into a monopod and becomes my indispensable assistant when shooting sports.
It is highly desirable to have a cable release or remote remote control to avoid camera movement when the shutter button is pressed and to prevent blur (especially at slow shutter speeds).
About filters. What do I need to have when traveling to landscape photography. First of all, of course, it is a protective filter - without it, nowhere. It will protect the lens from dust, moisture, and possibly save the lens if it falls (though this has never happened to me - I take my equipment very carefully, but no one is safe from this). Since I often shoot in the mountains, I use multi-coated UV filters as a protective filter, which not only protect lenses from mechanical and other influences, but also help to retain “soft ultraviolet”, and in the mountains they help fight bluish haze and a decrease in contrast.
The second filter that I put in my backpack is a polarizing one. It helps well to fight glare on the water, saturates the photo with a range of colors. I used to use it very actively to darken the sky, but in Lately I use it much less often - more and more often I resort to shooting with exposure bracketing and, if necessary, I take the sky from a darker frame.
For a wide-angle lens 14-24 I use all the same filters, but through this mounting system:

I used to love experimenting with Cokin filters (when I shot only with a 24-70 lens). Here is an example using the orange gradient filter:

I gradually moved away from using Cokin filters - I stopped liking the result, the filters, together with the entire attachment system, take up quite a lot of space in the backpack, and “winding up” the right colors is not a problem during post-processing.
Of course, a landscape painter also needs ND filters with different stops (ideally, you probably need to have one variable density ND filter - it will allow you to replace a whole set of ND filters of various densities and will not take up much space). An ND filter will help limit the amount of light when you need to use the widest aperture to reduce the depth of field. Most often, such filters are used to lengthen shutter speeds when shooting water - to obtain the effect of "milk rivers".
Now about the shooting itself. More often than not, landscape photographers shoot with the camera held horizontally, because it is in this position that we can create shots with wide and far-reaching landscapes. However, a horizontal landscape shot is not always prerequisite getting an interesting shot. If the scene you see requires vertical shooting, then all the accepted rules are thrown back. For example, if your subject is a lone tree, rock, or other tall object, you might want to consider vertical framing. I don't often take vertical shots, but sometimes it happens, like in these shots:


Landscape composition is the foundation of photography, and this is usually where the difficulty comes in. When shooting landscapes and creating composition, I took a few simple rules for myself.
- The frame must be harmoniously filled, i.e. it should not be overloaded with unnecessary details. Even when framing at the shooting location, you should try to cut off all unnecessary elements. The edges of the picture should not outweigh each other - the composition should be balanced.
- No matter how wonderful the composition is, but the light when shooting is one of the most important conditions for obtaining beautiful shots. In cloudy weather, you can rarely get interesting pictures, so you often just have to wait for good lighting. To get beautiful landscape photos, it is necessary that the main objects in the picture are highlighted by lighting - highlighted. And, of course, the best time to shoot landscapes is in the morning and evening, when the sun is not in a high position - it is at this time that it casts side shadows that create the impression of volume and depth.
- You need to compose the frame, usually using the “rule of thirds”. Most amateur photographers, of course, know it: we shoot in proportions of 1/3 earth and 2/3 sky, or, conversely, 2/3 earth and 1/3 sky.
- In order for the landscape to “play”, an interesting foreground is needed - a “stroke”, an accent is needed. Such an accent can be a stone, tree, flower, any snag, etc. It is the presence of the foreground that allows you to more realistically convey space in the landscape being shot and get the so-called “presence effect”.
- We apply the rule of the "golden section" for accented objects - we place them exactly at the intersection points. Blindly, mindlessly obeying this rule, as well as all others, is not worth it - you should always approach the shooting of each landscape individually, thoughtfully.
- A landscape shot should be multifaceted in composition, i.e. it must have a foreground, middle ground, and background. In this case, the focus must be necessarily in the foreground.
- Use the play of light and shadows - this is what often gives the photo a "zest", originality.
Of course, all the rules that I adhere to are not a dogma or an indisputable truth, but you need to know them and in most cases they help when shooting landscapes. But the main assistant for the landscape painter, of course, will be his own perception of the picture he sees, his inner sense of building a composition. The composition must be learned to "see" - if a person has at least a little artistic taste, this can be gradually learned.
Most landscape photographers like to shoot nature during golden hours. at dawn and dusk. Photos taken during these periods of time take on an absolutely magical look - the sun is close to the horizon, so the lighting is soft, diffused, everything around is filled with amazing color shades from golden yellow to crimson red. True, it is not always possible to “catch” the beautiful colors of sunrise and sunset, therefore, if possible, it is worth coming to the place chosen for shooting more than once. For example, not the first time I managed to capture the beauty of the dawn over Birdew - I left three times at 3.00 am (the road is not close), but in the end I was lucky to see and shoot a beautiful sunrise:

Interesting sunrise shots can be obtained by shooting near water bodies. In the dawn hours, as a rule, there is no wind, the water surface is completely calm, and the unusually soft colors of dawn can create magic and make even the most nondescript pond or lake mysterious. Here is such a golden dawn was filmed on one of the lakes of the Altai Mountains:

Sunsets are no less interesting to shoot than sunrises. The main advantage of shooting is that you don’t have to get up in the middle of the night and rush headlong, but you can safely get to the right place during the day and slowly prepare for the sunset. The sunset glow sometimes simply amazes with its variety and splendor of colors. Twilight creates absolutely magical pictures, enveloping the sky with unusually beautiful lighting in color and tone, therefore they are able to give landscapes emotionality and expressiveness. By the way, the most interesting and beautiful sunsets happen during weather changes, for example, a blood-red or purple sunset necessarily precedes the windy weather the next day. I managed to shoot such a sunset on Lake Teletskoye, this sunset shooting was not planned, accidental (the wayward spirit of Lake Teletskoye made us wait a long time for the moment when it was possible to go on a small boat on the way back to our parking lot), but for me it’s just " played into the hands":

Sunset colors are so diverse and uniquely beautiful that they can work wonders, turning absolutely nondescript daytime landscapes into interesting paintings. How here, for example, a completely unremarkable place near the river in the evening became interesting precisely because of the sunset light:

What is the best time of year to shoot landscapes? Yes, all year round. Of course, in warm weather it is much easier and more pleasant to do this (especially in Siberia, where I live), and good lighting in summer happens much more often than in winter, and the colors are more saturated and diverse, but in the cold season you can also get beautiful landscape shots - you just have to wait for the weather to be favorable for shooting. And someone will ask what favorable weather means in winter, and I will answer - when the temperature on the thermometer drops and the lower the better. In this regard, I’m probably crazy, but when weather forecasters warn of a severe cold snap, and most of the people, wrapped in warm blankets, drink hot tea with lemon at home, I collect my equipment and rush thousands of kilometers so that in these frosty days have time to shoot unusually beautiful winter scenes. Here, for example, this landscape (on the street minus 30 °):

I will dwell a little on the technical aspects of landscape photography. I always shoot nature in manual mode (M). For the most part, landscape shots require a large depth of field, so to achieve greater depth of field, the aperture should be covered. I usually use f / 8-f / 11 in fairly good lighting, I clamp it harder when shooting sunrises, sunsets, when I shoot the sun in backlight so that “rays” appear. If the task is to blur the background and at the same time highlight the object being shot, then the aperture must, of course, be slightly opened. Exposure will depend on many factors and tasks set during the shooting. If the shooting takes place in quiet, calm weather, the shutter speed is not so important - we set the desired aperture and, guided by the exposure meter indicator on the camera, set the desired shutter speed. If it’s windy outside, then it’s better to shoot at shorter shutter speeds in order to “freeze” the picture, so to speak, without giving the breeze the opportunity to “smear” leaves, grass, etc. in the picture. Light sensitivity (ISO) is usually set low to avoid digital noise. Many people recommend using a value of 100 when shooting landscapes. But lately I have been increasingly using slightly higher values (200-400), which, in my opinion, gives a better study of the background of the photo. But I still prefer to shoot sunsets and sunrises at ISO 100. Another thing that is definitely important is to turn on the indicator of overexposed areas, the so-called “flare” mode, and, of course, shooting in RAW (I don’t even think about this worth talking about).
In conclusion, I want to say that shooting nature is like getting into another world - a world of amazing, unique beauty, filled with extraordinary colors that the world around us is so rich in. The main thing is to be able to "see" this beauty. If a beautiful view of nature delights you, while your soul sings, and your heart is filled with love and bursts out of your chest, then this is the first step to success in obtaining beautiful pictures. I wish you all interesting stories and successful shots!
Scenery It is an expanded picture of nature. It would seem that it could be easier than taking a picture of the view you like. However, a few useful rules for landscape construction will help you to create high-end photographs.

Rice. 2
The basis for constructing a spectacular landscape are the unbreakable rules of composition. This is where the law of thirds comes in handy. Mentally divide the frame with imaginary horizontal lines. Always position the horizon line so that it intersects the landscape at a height of one third of the total height of the frame. (Fig. 1.2)
There may be exceptions if, for example, you want to emphasize the symmetry of the composition as in Fig. 3 (sea and sky).

Fig.3
In the landscape, the "protagonist" is of great importance. It can be a tree, an interesting building or group of buildings, an unusually shaped cloud, a yacht, or something else. The main character should be placed at the intersection of 3 vertical and 3 horizontal lines according to the rule of thirds.

Rice. 4
Versatility is one of the main characteristics of a good photograph. It is difficult to achieve the effect of spatial depth in the frame, but this is aerobatics. This is where the knowledge of the principle of perspective comes in handy (Fig. 5).

Rice. five
Use a wide-angle lens, it will help you create the effect of the third dimension. But at the same time, remember to fill the foreground. In landscape photography, the center of the composition is almost always the horizon line. Unfilled areas of the foreground turn into compositional "holes". A flower, a tree branch, a gate, and similar seemingly insignificant elements of the composition can compensate for the emptiness of the foreground.

Rice. 6

Rice. 7
Practice: the low point is often the best when shooting landscapes. A dull grassy lawn in the foreground can be brightened up with an unexpected flower. A pile of picturesque boulders will be a suitable impetus for the viewer’s gaze to move along a winding path deep into the frame to a picturesque hill (“the main character”), as in Fig. 6.7.
Remember that the person is not looking at your image with a fixed gaze. The gaze moves along obvious or invisible lines that connect the individual elements of the composition. If these lines are diagonals, your landscape will gain dynamism and become much more interesting. The natural appearance of diagonals in the frame can be achieved by a good choice of shooting point. In this case, the left diagonal is always more expressive than the right one. A single diagonal is most effective when it is at a 45-degree angle to the horizon (or the bottom edge of the frame).

Rice. 8
Converging diagonal lines, as you know, are the basis of the principle of perspective (Fig. 9).

Rice. nine
Practice: When two objects of equal size appear in the frame, choose a shooting point from which one of them will appear smaller than the other. This will create the illusion of versatility in the image.

Rice. 10
An unusual angle for a landscape is just as possible as for any other genre of photography. Top view will save you from being caught in the frame of the sky or the horizon line. But you probably will not have problems choosing the right shutter speed for too bright sun (Fig. 11).

Fig.11
The advantage of a low vantage point is that the size of the subject in the foreground optically increases in the frame. This is especially important when you want to make a still life with a landscape in the background. Use a wide-angle lens, which will create a deep perspective in the frame, but even distant objects will remain in focus.
Photography is light. When shooting panoramic landscapes, the photographer always has to wait for a natural spotlight to appear in the gaps between the clouds, which will brightly illuminate the desired area in the frame. The most important thing here is to be patient, although the ability to catch the slightest changes in the weather also does not hurt. It is hardly worth shooting a landscape in rainy or cloudy weather. But as soon as it begins to clear up, the sun shines through the clearings between the clouds. Try to catch a ray of sunlight sufficient to illuminate the landscape.

Rice. 12
It is under such conditions that the contrast between the bright sun and gloomy clouds can be especially expressive. An important factor in successful outdoor shooting can be even the past rain, which cleared the air of dusty suspension, dispersed atmospheric haze and significantly improved visibility.

Rice. 13
Understanding the nature of light and its ability to turn even the most boring view into a stunning canvas is a fundamental skill for a serious photographer. The most spectacular landscapes are obtained at dawn and at sunset.

Rice. fourteen
The sun gives side light, high contrast and deep shadows make the space more expressive.
If you're shooting on a clear sunny day, beautiful white clouds can bring nature to life, as shown in fig. 15-16
Rice. 15

Rice. 16
If you decide to become a landscape photographer, get ready to travel. Your true friend will be a tripod. And the heavier it is, the more successful the pictures will be.
Landscapes are different: mountainous and flat, rural and urban, sea or forest. Landscapes can be shot at any time of the year, at any time of the day and in almost any weather.
The most beautiful are landscapes in which there is water. Whether it's a fast mountain river, a waterfall or the vast expanse of the ocean - such landscapes always attract the viewer's attention with their beauty (Fig. 17-18).


Practice: use a tripod and shoot at a slow shutter speed to capture the movement of the water (Fig. 19).